There are several ways of sterilizing materials, depending on their properties and resistance. The most common one is autoclaving, but UV light exposure and ethanol dipping are good options for materials that cannot be exposed to high temperatures. Finally, liquids can be sterilized through filters with pore sizes smaller than the size of bacteria/yeast.
Autoclaving

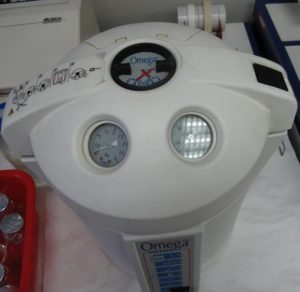
An autoclave is a machine that brings its contents to a very high temperature by injecting vapor into a pressurized sealed container, which is pretty much like a pressure cooker. Materials should be kept in a special autoclave bag in order not to contaminate them when taking them out. The autoclave bag can then be opened inside the hood and the sterilized material used. The bag is sealed using special tape that is autoclaveable and will change color when the sterilization temperature required is reached.
Therefore, when you take materials out, the tape confirms the adequate temperature for sterilization has been reached. Both lab consumables (micropipette tips) and core materials (bioreactors, micropipettes, lab tweezers) are sterilised in this way. If sterilizing glass bottles with caps, ensure you leave the screw cap slightly unscrewed so the glass doesn’t break as a result of pressure difference. Remember, not all materials can be autoclaved; glass is always safe if protected (so you don’t hurt yourself when taking it out), some plastics with high melting temperature are ok too, metals should be fine as long as they are corrosion-resistant (because they will come into contact with water).
UV light sterilization
Ultra violet light is quite strong; it can kill bacteria if exposed for the right amount of time at the right distance from the light source. UV light sterilization is typically used to disinfect incubators and laminar flow hoods overnight, as they cannot be autoclaved completely (mobile parts can and should). For materials, they should be exposed inside the hood at a distance of around 15cm from the light source during a few minutes. Remember that you should always wear special protective glasses when the UV light is on and ensure there are no other people working in the room. A sign indicating where the UV light is and saying that it’s on should be placed at the entrance door. If it’s inside the incubator, people can still work in the room without UV glasses but a sign also needs to be placed on the door.
Ethanol sterilization
As you already know, ethanol is a great disinfectant and very good at killing microorganisms. If exposed for the right amount of time, materials dipped in ethanol can be sterilized. However, it is recommended to use UV light as a second step to ensure complete sterilization. Both steps should be carried out under the hood, so the air is not contaminated and there is a correct ventilation. Always check the materials you’re using do not react with ethanol.
Sterile filtration
When preparing custom medium or reactants, you sometimes need to operate outside the laminar hood in non-sterile conditions (because you need to weigh substances or simply because the material doesn’t come sterile). In this case, it is not possible to sterilize it by heating it up (it may decompose), can’t be decontaminated with ethanol (your cells won’t like it) and can’t be UV’ed (it may deactivate important nutrients or proteins in your medium). The only option here is to apply mechanical sterilization procedures. Since microorganisms are larger than the largest proteins and molecules in your culture medium, they can be filtered out by using a sieve of an appropriate pore size. Sterile filters come in a variety of shapes and volumes (200 mL, 500 mL, 1L) and pore sizes between 0.1μm and 0.22μm. They come in a sterile bag that you should open inside the hood. The liquid to sterilize is placed inside the top cup and the lid is placed on top as soon as possible to avoid air contamination. The vacuum tube is then connected to the port below the cup and suction starts forcing liquid down the filter, to the sterile bottle. Once filtration is over, the cup can be unscrewed from the bottle and the sterile cap can be screwed to the bottle. This medium / reagent is then ready to be used under sterile conditions, and should be kept sealed at all times in the fridge or at room temperature, depending on the specific storage conditions.
